Vegetables, yarn, and yarns: all of my passions all in one place.

Wednesday, December 22, 2010

Mushroom Gravy (and the Poutine it inspired)

If there's one thing I miss as a vegetarian, it's gravy. And it's not because gravy tastes groovy or anything like that. Really, the reasoning is quite similar to why I could never give up ice cream: some foods equal comfort. And gravy is one of them. There's nothing that says "party time" quite like a heaping pile of whipping potatoes with a well in the middle that overflows with gravy. For the past few holiday season's, I have watched others' potatoes heaving and gravy strewn whilst mine went bare, but no more.

I have discovered mushroom gravy. And it tastes so good.

So it went like this: Garet decided that December should be Canadian month. But try as we might, all we could think of that we Canadian without also being American was Poutine, a strange french fry concoction I once say Anthony Bourdain eat in Quebec. We ended up expanding the fare to North American of course, but we did want to give this puppy a whirl.

The only problem: Bourdain's poutine consisted of fries fried in duck fat and covered in, among other toppings, gravy. So I consulted some cookbooks and discovered we veggies do have our own "gravies" just like we have an answer to every other meat-friendly entre (I'm ever fond of the smart dog as well on that front).

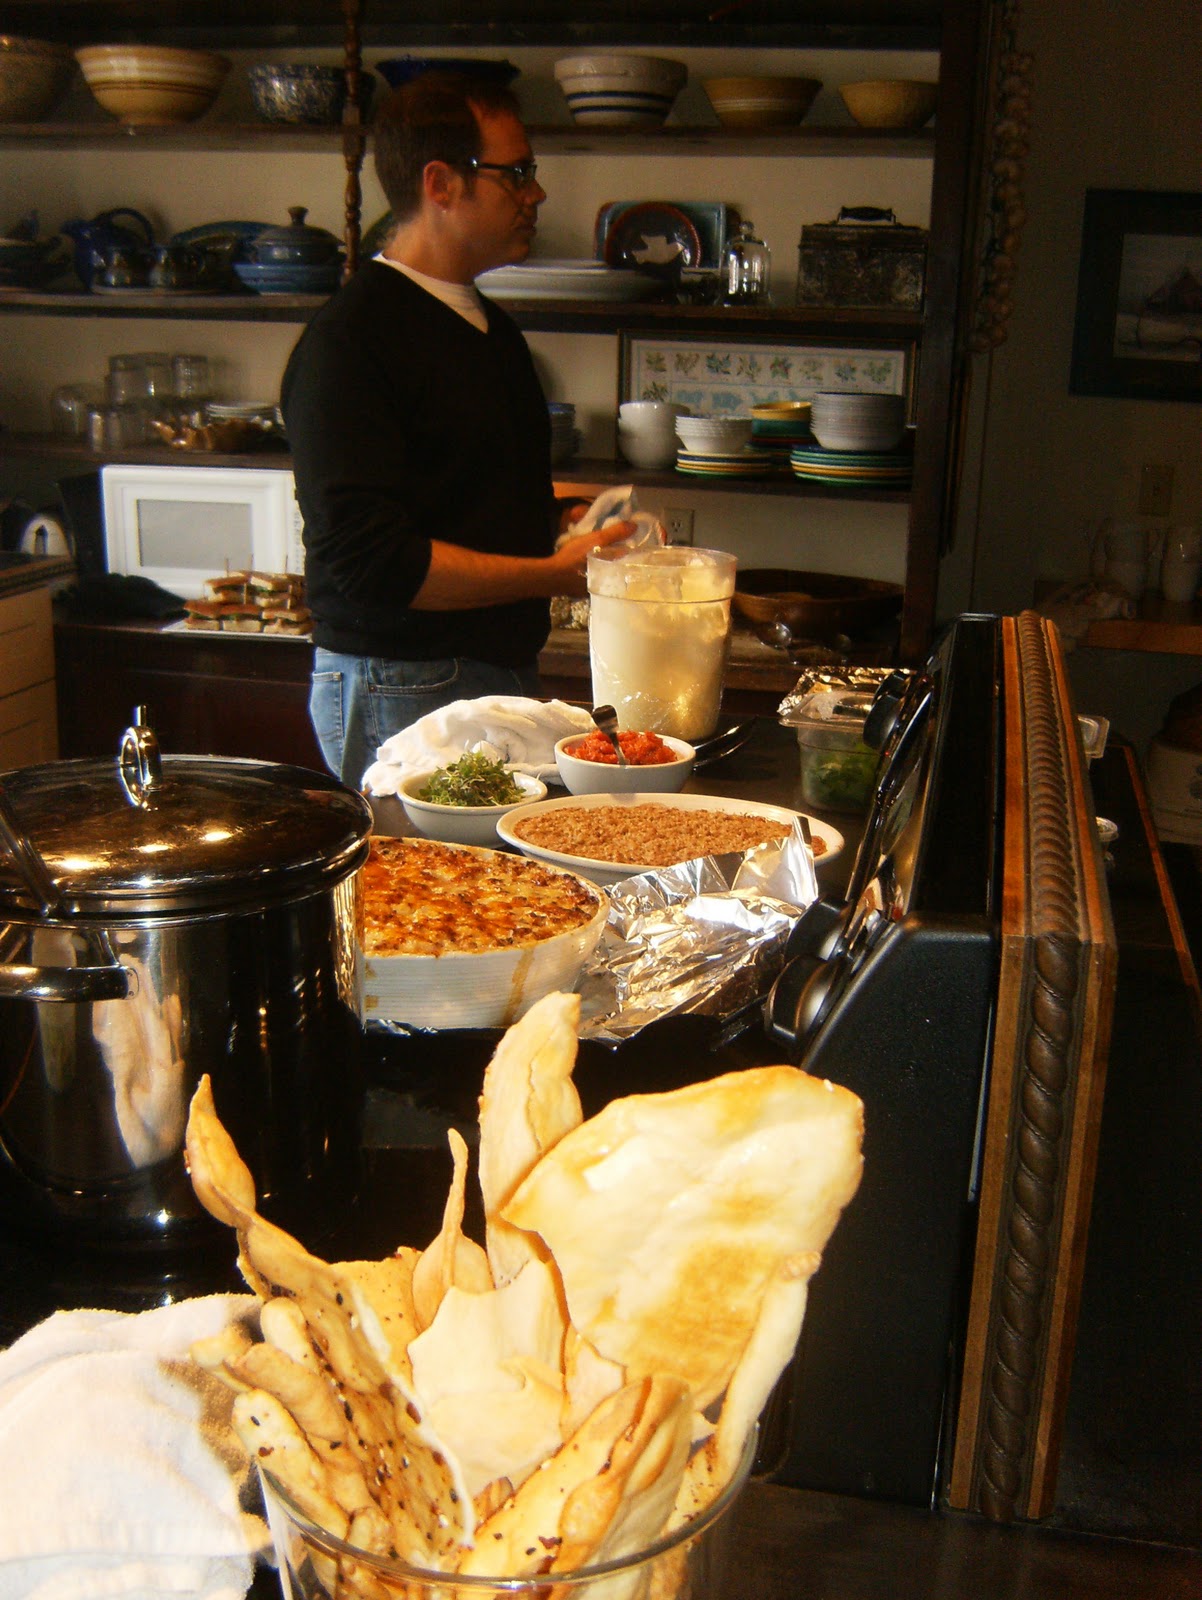
The fun thing about Poutine is it is a smorgabord a la fries, so while there are obviously some traditional toppings, anything goes. So for this one, we ended up cleaning out the fridge in the process as well, a splendid bonus. Art cooked up some chicken and gravy with greenbean casserole the night before, when I was at school. All that was left to do so make my end of the meal, the veggie gravy. The man was kind enough to grab a couple packages of white button mushrooms at the local grocer. It was all cake after that.


Mushroom Gravy
--Makes 2.5 c.--

2 c. water
1 c. chopped white mushrooms (I got white button on sale to boot)
3 T soy sauce
1 t thyme
salt and pepper
1 1/2 T cornstarch dissolved in 3 T water
1 t vegetarian browning liquid (such as Gravy Master)

1. In a small saucepan, combine water through thyme. Season with salt and pepper and bring to a boil. Reduce heat to low and simmer for three minutes to soften the mushrooms.

2. Transfer mixture to a blender and process to smooth. Return to saucepan over high heat and bring to a boil. Reduce the heat to low and whisk in the cornstarch mixture. Stir until sauce thickens or if you get impatient like me, add a few handfulls of flour one at a time while stirring until the gravy is of a gravy consistency. Stir in the browning liquid (I was less thrilled with my off brand but I get to thinking that vegetable Better than Boullion would get the job done and taste better. Try it if you wish. I know I will.)

3. Taste to adjust seasonings. Serve hot (in case this didn't seem obvious).

For the Poutine, I also stir fried up the rest of the mushrooms in the package with a little strawberry Balsamic, leaving them on long enough to start to carmelize.


As for the Poutine itself, there's no hard and fast recipe here. Just cut up some potatoes and put them on a cookie sheet in the oven on 350-400 for about 60 minutes (30 minutes and then flip for the last 30). Then go wild with the toppings and gravy. For the boys, the leftover chicken and gravy did just fine, though they, like me, opted for shredded cheese rather than the traditional cheese curd.  For myself:

A nice oven baked french fry base
carmelized mushrooms
leftover green bean casserole (reheated)
mushroom gravy
shredded cheese

It was a meal of comfort food topped with comfort food and then drenched in liquid comfort. A delight for the tastebuds and the stomach, with its meaty mushroom earthy meets carb standby favorite meets green bean... well... greenness. It might look a bit regurgitated, but until the potato-less gratin, it only looked unattractive. This is one of those adventures that I definitely want to repeat, and I did it all without duck fat.

Saturday, December 18, 2010

Potato-less Gratin

Sometimes you try something and it fails. This is one of those times.


I saw this recipe in the French Women Don't Get Fat Cookbook called Pumkpin and Apple Gratin.  We had some orchard apples left at the time and plenty of butternut (which is allowable as a pumpkin substitute in said recipe, and I thought, "Heck, why not?"

Famous last words.

I did the recipe fairly as presented. Which is as follows:


Pumpkin and Apple Gratin
-serves 4 to 6-
2 T unsalted butter (plus some for dish)
2 lbs pumpkin or butternut squash, peeled, seeded, and cut into 2-in pieces
3 baking apples (I used golden delicious)
1 T lemon juice
salt and pepper
3/4 c creme fraiche (or greek yogurt)
pinch cinnamon
1 med onion, chopped
1 T chopped walnuts
3/4 c feta, crumbled
1 t thyme

1. Butter 9x13 baking dishand add sliced pumpkin and apples. To slice my pumpkin, I brought in my handy pseudo house husband assistant. I handled the apples all my own. Sprinkle with lemon juice, dot with 1 T butter, and season. Place in the oven for 20 minutes.


2. In med. bowl, combine yogurt and cinnamon. Melt 1 T butter in pan over med. heat. Add onion. Saute until soft, 3 min. Remove and stir in walnuts, feta, and thyme. Add onion to yogurt and stir. Pour over pumpkin and apples and return to oven.

3. Cook until veggies are tender and top golden, 20-30 minutes.


I'm not sure if French women get fat or not, but I know this, they aren't if they eat this side dish. Not only did it taste like gym shoes smell and look like vomit, but a half hour after consuming my gratin dinner, I was physically ill for the rest of the night, though if you were going for a nice, thorough bowel cleanse, by all means, this is the recipe for you.

Friday, December 10, 2010

The sauce! The sauce!

Still, I am horribly behind on recipes. Every time I think I've caught up, there's another card added to the stack. In current events, the boys and I have decided to do cultural food months. November was Mexican month, as Garet will try anything as long as you tell him it's Mexican. You see, he's part Mexican and he's very into genealogical awareness.December was supposed to be Canadian month, but alas, Canada's eat pretty much the same things we do (with the exception of Poutine and Caribou). Thus, December is North American month, so we can experiment with southern dishes, for lack of Caribou. Obviously, not every day will be a culinary experiment in the region of choice, but we try to do it at least one or twice a week. Last month went really well and I have high hopes for this month.

Coincidentally, I am behind enough on the blog that I haven't shared any of November's Mexican masterpieces. Next week marks the beginning of winter break, though. As a matter of fact, today is my last day at the internship, which is a sad yet happy revelation. Soon, I will be allowed the option to sleep in, at least for a little bit. And by sleep in, I mean remain in bed until about 8, when the kid will insist I get up regardless. That being said, I will be trying to submit almost daily contributions to the blog to get it more up to date with what's happening in my kitchen. The excitement is mounting.

Until then, least's go back to the beginning of the recipe stack, to august, when the tomatoes were reading high and red on their vines. In fact, this little recipe goes hand in hand with my eggplant meatball fetish, because what does better with meatballs than a pot of homemade spaghetti sauce. This recipe comes to us from one of my favorite author's, and the very one who brought you the pizza dough I am so fond of using... Barbara Kingsolver, as found in her book "Animal Vegetable Miracle." Here it is, the Kate-ified version.


(pictured here with eggplant parm)

Spaghetti Sauce a la Kingsolver
(This is not a canning recipe)

10c. tomatoes
1 12 oz. can roasted red pepper with garlic (clearanced at Aldi!)
3 small peppers
1 onion
1/4 c. basil
1/8 c. honey
1 T oregano
about 1 T salt
1/2 T thyme
1/2 T garlic powder
1/2 T parsley
1/2t pepper (I used 1/2 cayenne)
1/2 t cinnamon
1/8 t nutmeg

1. Peal tomato skins off. You could find a quick and easy way of doing this, or you could sit there for a very long time stripping raw tomatoes, as I did. If you use closet-ripened tomatoes, as one batch I did was, you may want to add a few canned tomatoes to the mix to achieve a normal looking red hue to the sauce. There's a chance, otherwise, that it will come out orange. Then, put the tomato and the red peppers into a blender and puree.

2. In large pot, cook diced onion and peppers to soft. You could dice the onion yourself, or make your pseudo house husband do it, that is, if you too have one.

3.Add puree tomato/red pepper mix to pot, along with basil, honey, oregano, salt, thyme, garlic powder, parsley, pepper, cinnamon, and nutmeg.


4. Boil and then turn head down to simmer. simmer 2-3 hours, until sauce has reached desired consistency. Freeze in containers if desired.

So here it is, after so much waiting, a delicious homemade sauce that canned sauce can only wish it was. Goes very well with eggplant meatballs.

Tuesday, November 23, 2010

At the Farm

This isn't exactly a vegetarian manifesto of a post, more of a local food manifesto, really. On the first of November, my unpaid internship gave me something to sink my teeth into, literally. The producer I work for decided to do a segment, to air on thanksgiving, for the Cleveland-based tv show called Applause.

In all honesty, I have no tv show watching capabilities in Cleveland, but I've seen a lot of raw footage from shoots before, and it's quite a show. It's one of the few shows that make me wish I could afford (or had any sort of time) to watch tv. And the people I work for are fantastic people, very kind and generous and friendly, even when I'm not at my best. I guess I might be a wee bit biased. Anyway.

My producer invited me to shoot with him at the Miller's farm in Pennsylvania, about a two hour drive from the heart of Cleveland. First, though, we had to pick up the camera man and stop off at a Starbucks. What road trip is complete without Starbucks?

Quickly, the passing scenery flashing its way across the back windows of the TV van went from urban to suburban to "do people actually live here?" We pulled into the driveway a half hour behind schedule, which, incidentally, was still a half hour ahead of planned scheduling (radio/tv people always allow some leeway time). Immediately, the Miller's welcomed us to their farm. Cows mooed in the distance. Hay bales sat in tidy bundles. And hey, was that a sheep?

No doubt about it, this was a farm, and not just any farm. The Millers raise grass-fed beef, chicken, turkey, lambs, pigs, and eggs. In this quiet Pennsylvanian setting, we had happened upon the Mecca of the Cleveland local food scene: free range animals.

I must admit, I have been to the farmers market in Shaker Square and seen the pictures on display at the meat tents. "Look how happy this pig's life was!" The pictures say, often with cameos from the farmer's various children accompanying the animals in question. One big happy human-animal family. I'm not sure I quite believed until I saw the cows at the Miller's farm.


When these cows moo, they sound contented. The chickens wander, pecking cow pies in the grass, wandering stiff-legged around a small (non-sewage-based) pond. Their eggs are a pretty pastel of brown and white, and as the farmer collects his bounty, they eat, unperturbed while the cows look on, munching clover.

"Come on, girls," the farmer calls and the cows follow. Mooing with curiosity. What will he do this time? Feed us? Let us out into a new pasture? The turkeys mill about, choosing their own blend of wheat and grass, while the farmer talks, with starry eyes, about the sound they make--such a happy sound--when the turkeys are let out to pasture. And the pigs? They love a good ear-scratching as they nose the camera man's pants, the farmers hands, the gaps in the fence bars that separate them from me. They seem to say, "Hey there. Want to play? There's plenty of mud."

Does this sound sappy? Damn straight it does, but it's also true. As a vegetarian who is so because of health and no other reason, I find the peaceful scene of the Miller's farm and their carefree animals has made me a near-convert to PETA-like causes. Who could eat this face?


Or perhaps knowing that this face is one that has known peace in its life makes it particularly good eating. Certainly better eating than a pig with a clipped tail in a room overflowing with pigs, all of whom have never so much as rolled through the mud.

It was a cold day but a good day, and I feel wiser having been a part in it. At the end of the shoot, the Millers and a slew of local Cleveland foodies sat down to a local food feast prepared by the chefs at Fire restaurant. And yes, I got to eat to. What a display. The table was full-out decked with fall cheer and set up in the hay loft of the barn.

But first, we all enjoyed mulled cider with crackers and local cheese inside the Miller's architecturally intriguing farm house in the company of one another and the Miller's two springer spaniels.

The spread atthe feast itself included Miller meatloaf sandwiches on focaccia, Miller beef stew, roasted Miller chicken, roasted veggies with Miller bacon, Cauliflower au Gratin, a mesclun mix salad, firecracker bread (in vase on table), local Ohio wine, and for dessert, an apple cobbler with honey cream on top.

I didn't partake of the meat (obviously) but I usually don't enjoy cauliflower and it was divine. The firecracker bread was crisp with a hint of spice. The salad was tasty with its fresh local greens. And the dessert: I'm not sure what was in it, but I wanted more. And then more. The honey cream only added to my delight. Cream AND honey? I suddenly understand why a land of milk and honey is a cliche for paradise.


I even found myself sampling the veggies cooked with bacon, though I did not eat the bacon. Best brussel sprouts I've ever had. In fact, the stop before we headed back to the land of the Cleve, we stopped in at the veggie farm that was home to these little babies, where we saw the greenhouses in which the salad greens were grown, the field housing not only veggies but two beehives with which to pollinate the crops,and of course,  the sprout plants themselves:


 Now that looks like something I want to eat.

The show will air this Thanksgiving, with several reairings during the holiday season and an option for online viewing at some point in the near future. Go to WVIZ's website for more info.

Make sure to check it out, though. After that meal, even the barn cat was pleased.

Saturday, November 6, 2010

The green tomato experiment, the results, plus a lovely soup

Recap: The growing season over for my first garden, I was left with some 30 odd green tomatoes, so I decided to try a home-ripening method. I tied them five in a bag along with a green banana to the pole in my hall closet. I'm sure my fair readers have been anxiously awaiting the results of this experiment.

The results are in:


They didn't turn totally red, but they did ripen, the perfect sort of tomato to puree into a soup or sauce. We did both. The sauce will come in another blog (yes that same sauce used with those delicious eggplant meatballs). The soup I made today, a nice and simple lazy Saturday lunch.

The soup comes to me from a cookbook I fell in love with last year when I got it out of the library. One Amazon buy later, it rests in my kitchen on the cookbook shelf.

Tomato Bisque
-Kate-ified from the Vegetarian Lunchbasket

2 T butter
3 T flour
2 c milk
2 c tomato puree
1 t dried basil
1 c Israeli couscous
1/2 c grated Parm cheese
salt and pepper to taste
a dash of cayenne

To prep: I pureed the five or six tomatoes, some from the batch I decided to ripen on the kitchen counter instead of the closet (they took longer), others were the last of the closet experiment. I cut out the stems, top and bottom, and pureed them in my blender. Two cups exactly.

1. In a large saucepan, melt the butter over med-low heat and whisk in the flour. Stir for 3 minutes. Then, slowly add the milk. Simmer until milk thickens.

2. Put 1 c. water in a small saucepan. And allow to boil. Add the couscous to the water, cover, and cook over a low simmer. Add the tomato puree and basil to milk in large saucepan. Five minutes later, add the couscous to the large saucepan and leave on simmer a few minutes more.

3. Remove the pan from heat and stir in the Parm and dash of cayenne, plus salt and pepper to taste.

Supposedly, the recipe serves four. In this household, I'm the only tomato soup fan. So it should serve me for about five lunches, give or take. The extra bonus, this is a soup ready in about 15 minutes, so those in search of a quick, healthy meal because they, like me, are having a rough fall semester, look no further. I just hope you too enjoy tomatoes.

This soup is a delicious fall treat, one that beats the pants off my usual "comforting" can of Campbells tomato, or would if cans had pants.

It was light but warm and creamy, and the couscous added a touch of texture that doubled as a way of making me feel "full," something tomato soup just doesn't do for me. Face it, it's really more like a drink. But this bisque wasn't, and my Kate-ifying ingredient (well aside from the couscous--the original recipe called for rice), the cayenne I added on a whim, gave the whole dish a slight kick that acted as a nice pick-me-up to carry me through the rest of my lazy Saturday.


Aside from the closet-tomatoes sauce, there are a great many upcoming food excitements. Here are some teasers for what's to come in my written recipe:

The weekend of Halloween, Art and I visited my favorite Michigan orchard for a half bushel of golden delicious (my favorite apple) and a bushel of squash. Purchased for the low cost of $5, the bushel is a mix of butternut, acorn, and hubbard. We decided against pie pumpkins this year, because of my freakish fall 2010 schedule, but rest assured, next year, I will make a pie pumpkin pie.

Already, the apples are too ripe for munching and I have plans for a casserole that mixes the flavors of all of my orchard finds. That, or we'll just make apple sauce.

More exciting though, this past Monday, I found myself at a Pennsylvania grass-feed farm-- for work. Yes, the producer I'm interning under at the local NPR/PBS station is doing a tv piece on local food for thanksgiving and he invited me to come to the shoot and help out. Blog forthcoming.


Thursday, October 28, 2010

Eggplant Meatballs (finally)

There are meatballs and then there are meatballs. And then... there are eggplant-filled balls meant to make the meatball obsolete. The eggplant meatball. I first heard of these when I saw them frozen in my grocers freezer last year. My mother makes a mean grapejelly meatball via frozen bulk meatballs and I quickly purchased a crap-ton, filled my crockpot with the necessary sauces and voila! Of course, those particular "meat"balls, without the saving grace of chili sauce plus jelly, are in a word "bland." In another word, "tasteless."

A few months back, I was in the library (shock me) and happened across a display of veggie cookbooks out for what was then gardening season. I flipped through one with a delicious looking cover, and right there in front of me was a recipe for eggplant meatballs.

Now, I couldn't tell you why it never occurred to me that one could make such meatballs and instead, assumed that one could only purchase said meatballs for far too much money per box. All I can say is: I grew up in America. And so, let's face it, there was a time in my life where I assumed peas was created--miraculously--from a can. So, cut me some slack on this revelatory moment. I was just uber excited. And from the pictures, they looked GOOD.


The pictures do not lie.

Eggplant Meatballs
-from Totally Vegetarian

2-3 T olive oil
1 med. onion,dice
1 med. eggplant, cut in 1/4-1/2 cubes
1 1/2 c. toasted walnuts,chopped
sea salt and pepper
2 c. dried bread crumbs
2 large eggs, beaten
1c. Parm. cheese, grated
3 garlic cloves, crushed
zest 1 lemon
1 T dried parsley
1 T oregano
1/2 c. basil
veggie oil spray

1. Preheat your oven to 375 F. Lightly oil a baking sheet. If your bag o walnuts is not toasted (as mine never is), spread the necessary amount of raw almonds on the sheet and pop them in the oven. As soon as they start to smell, take them out. Roasting walnuts is not a lengthy process. Chop the walnuts and set them aside. Then re-oil the baking sheet.

2. Heat large skillet and sprinkle with 2 tablespoons olive oil. When the skillet is hot, add onion and saute on med-low until translucient, about 5 minutes. Add eggplant and sprinkle with salt.  Saute until veggies are soft and fragrant, about 8-10 minutes, adding oil as needed.

Or, saute the eggplant a day or so ahead, like I tend to do and freeze it. Then, when you saute the onions, add the defrosted eggplant and in 5 minutes, voila: ready for the next step.

Transfer to a large bowl.

3. At this point you add the chopped walnut to the eggplant and mix well. You need a food processor or, if you have no processor, at least a blender. Warning: spoken from personal experience, the processing of walnuts in a blender tends to gum up the works (i.e. it turns into walnut butter and stops the blades from moving. Put a "generous cup," whatever that means, to the processor/blender and hit frappe. Once it's all walnut buttery batter, return it to the bowl. Add breadcrumbs-basil and mix well. Then rub olive oil in your palms (its greasy but oddly satisfying) and shape the mixture into meatballs about the size of golfballs.


4. Place the balls on your baking sheet and bake 20-30 minutes. Then, remove the pan from oven, cover with foil to steam, and ta-da meatballs.

The first batch, I combined all the balls at a two to one ratio and flatted them to make veggie burgers.


Upon learning this recipe, I have taught it to my man, and up until this past week, when the last of the eggplant was finally meatballed, I had him whip up batches for me to take with me for dinner between my internship and my tuesday and thursday night classes. These meatballs are great by themselves, a little nutty with the taste of the grease from the pureed nuts and the olive oil added in, plus the eggplant's veggie heft and texture, the parmesan's sharpness, and the bread crumbs to make it all come together. I've never had a real meatball that can compare to these fakers. On a sandwich, they make a nice substitute for falafel balls (or as veggie burgers, as previously stated). I've never had the chance to try, but they can also be crumbled for a taco fiesta of eggplant proportions. All that said, they taste magnificent with pasta sauce and a nice whole wheat linguine, which is how I find myself eating them right at this very second.

(Picture to come of this fabulous meal as soon as I get the camera home and uploaded.)

And the pasta sauce I'm using? That's for another time.

Wednesday, October 20, 2010

Slacking is what slacking does, or I'm wallowing in green tomatoes

Yikes. I can't believe it's been a month since my last post. I can imagine my four dedicated readers hopelessly anticipating that eggplant meatball recipe. Alas, today is not that day.


Today, I'm talking tomatoes. The garden season is coming to an end. As a matter of fact, by community garden rule, my plants must all be uprooted and composted by the end of October 23. Not a big deal. Most of the plants are done producing anyway and the kale plant I intend on uprooting only so long as it will take me to re-pot it and put it in my living room window. Then, there are the tomatoes.

Last week, Art and I ventured to the garden to check on the damage. All three tomato plants were festooned in tomatoes, all of them bright frickin green. Still. We came to terms with the fact that they aren't going to ripen before garden strip time. Solution: we picked all of the big ones, 30 in all, and discarded the ones that seemed in any way damaged or "diseased." Then, I got on google and I searched for a slow indoor ripening method. I found several, but many that just weren't practical with our apartment-sized living space. The one I settled on is the plastic bag method. You put about four or five tomatoes in a plastic bag with holes pricked in it for proper "breathing." Then, you stick a green banana in the bag and tie it up. Six plastic bags and bananas later, we have a row of tomato-laden Giant Eagle grocery bags dangling from the coat-rod in the hall closet. So far: one tomato has ripened.


Luck seems like it might be in our favor. However, dear reader, I have a favor of you. Should these tomatoes not ripen (and that's not even counting how many new ones will be there when we go for the big dig-up later this week), I need some ideas on what to do with them. I mean, I love my baked fried green tomato recipe (and I hope you do too), but a girl can only stomach so many before she just doesn't ever want to eat another one.

What the heck else can you do with a green tomato?

Monday, September 20, 2010

Anything and chocolate

I'm your standard everyday overachiever. I am one of those people who overschedule, overbook, overkill everything. And as I'm trying to do what good ole Semenza taught me to do in Graduate Study for the 21st Century and work work work harder, longer, and faster than even your professors work, just to prove your chutzpah, I find that I have no time for, well, anything not in some way directly related to schoolwork, including my 20 hour per week internship at the local NPR/PBS station.

The blog has taken a hit and for that I apologize. I still have my index cards. One, in particular, a nice eggplant meatball recipe, I've had Art make again and again for me to take in tupperware and leave in the faculty frig for supper before night class after teaching and doing NPR research all day. It's coming soon and believe me, you're going to love it. In the mean time, Mondays I get home in enough time to eat with my boys. Today, Art made a fun concoction that started out as stir fry before he realized we were out of the usual stir fry veggie standbys.

Instead, he added a bit too much dark chocolate baking cocoa into the rice, adding black beans, a can of tomatoes, a can of mixed veggies, and a can of diced tomatoes (dented and clearanced at Kroger). It was a rather strange color but utterly delicious. I have no photos. I have no recipe. Just my man, a pan, a larder full of canned goods, and a starved, overworked vegetarian in need of both vegetables and protein.

And chocolate, as everyone knows, goes with anything. Magic. Do I have the best guy on the planet or what, ladies? Black beans and chocolate... love if ever I saw it.

Saturday, September 4, 2010

Baked stuffed tomatoes and other adventures

A few weeks back, my cousin Kristin came in for a visit. This is how behind I am on blogging. My son was at his dad's for the weekend, so Art and I went online and found a nice fancy restaurant to take her to while she was in town, show her the best that Cleveland has to offer. Originally, I was thinking something in Little Italy. Then, Art found Pier W. It's a seafood place on the West side of town that boasts of a floor-to-ceiling, wall-length window with a view of downtown.

We didn't tell Kristin where we were taking her. Just went, and all of us were blown away. The food was excellent with a wide selection, including an entire vegetarian menu. I had the vegetarian plate, a sample of three popular options of their vegetarian fare. I did not take pictures, as I did not have my camera on me. But if I had, I doubt I'd have stopped eating long enough to snap a photo. Art got the Walleye Tempura, and Kristin ordered some sort of lobster pasta.

The reason I mention this before discussing my tomato-stuffing recipe: Kristin left her leftovers behind when she packed up her cat back in her car and headed for home, and I ate her leftovers on the side, next to these lovely tomatoes. I will say that I'd never had lobster before. I may never have it again, but the pasta was delicious, very rich and very tasty in small portions.

As for the bill, I prefer not to thing about it. Art paid and we're counting it as an early anniversary dinner and celebration over newly gained employment on Art's part, all rolled into one hefty check. Should you go to Pier W, be ready to shell out some cash, but know that the food is superb, the waitstaff is companionable and not at all snobbish, and the atmosphere is one-of-a-kind. Looking out that large window at the twinkling lights of downtown Cleveland was the only time I've ever seen Cleveland look pretty. And that's something.

The following tomato recipe, however, can be made at home with little cost to you, though you will not be able to plate it with Pier W lobster pasta.


Baked Stuffed Tomatoes
(for one- adjusted from Moosewood Simple Suppers)
What you need:
1 large tomato
salt and pepper
1/4 c. grated cheese
1/6 tsp. (eyeball it) dried Italian herbs (oregano, dill, thyme, etc.)

1. Cut the tomato in half and scoop out seeds. This was the part where I got a tad worried. You see, the ripe tomatoes I had on hand from the garden were purple cherokee, which is a rather meaty tomato, not a lot of seeds or seed cavities in which to put the cheese. In an effort to aide this process, I cut a small X in the center of each tomato half.
2. Oil baking dish large enough to hold the tomato halves side by side. (Or just use a tin-foiled cookie sheet). Place halves cut-side up on the tin foil. Sprinkle them with salt and pepper. Admire their dark coloration of red, how it grows lighter in color as it moves its way to the center of the fruit.
3. Put half of the cheese on top of each tomato half. Sprinkle with herbs. Try to get the cheese to fall into the X at the center and the tiny seed pockets at the edges of the extra meaty tomato.
4. Cover with foil and bake for 15 minutes. Uncover and bake until filling is hot and cheese is melted, 5-10 minutes more.

In the end, the baked tomatoes turned out better because they were a meatier tomato. There was more there to bake and thus, to eat. I would recommend you try for the meatiest tomato you can find when undertaking this particular recipe. The results are pleasantly surprising.The tomato itself becomes a bit sweeter from the baking, and the herbs give it that extra kick. Eaten alone, it's a filling, solitary meal. Eaten with Pier W lobster pasta, it's a party.

This one is a definite keeper, though I haven't as yet been able to remake the recipe. The sudden temperature cool-off, followed by a spike in hot weather again has done a number on the tomato plants. They have plenty of fruit on them, but all still green. Perhaps the sudden cool-off again today with help some of those green ones turn red.

Still, for a while there, I was swimming in ripe tomatoes from the purple cherokee plant and the beefsteak plant (Mr. Stripey is still holding out on me.) I started coming up with quick little recipes all my own to use tomatoes up before they spoiled. One such recipe, I remembered to photograph:


Back in the good ole days (two months ago), when IHop sent us weekly buy-1-meal, get-one-free coupons, Art and I often lunched at the International House of Pancakes, east Cleveland branch. Of course, being at the International House of Pancakes, my natural recurring order is none other than... tomato and spinach fake egg omelet. I do so love my pancakes, but I try not to order them from restaurants, as restaurants bring a four-stack of plate-sized pancakes, and I, of course, can't stop myself from stuffed all four down my gullet. Thus, I get omelet.

But IHop has stopped with the freebie coupons for some reason, so we no longer go there. But I can use garden ingredients to make my own, fairly attractive version:

Tomato and Kale Fake-Egg Omelet
What you need
about 1/2 c. fake egg, more or less, depending on the size of omelet you want. 1/2 c equals 2 eggs, roughly.
1 med. beefsteak tomato
about a handful of pre -chopped, -blanched, and -frozen kale
cooking spray

1. Spray small skillet with cooking spray. Measure out 1/2 c. fake egg and add it to the skillet. Set on Med-low heat. When sides stiffen and top begins to set, flip and cook another few minutes. Plate omelet.
2. Spray same skillet. Dice tomato and add it to the skillet, along with the kale. Cook until heated. Transfer to middle of plated omelet.
3. Fold omelet over (with an optional bit of cheese, if desired) and enjoy.

What I learned: Kale tastes even better with a tomato omelet than spinach does.

Monday, August 30, 2010

Open-face Broccoli Melt

I've been hearing a lot of hype about this Cleveland restaurant that's just opened up a branch on the east side. The place is called Melt, and I have never been there. I must admit, I've been intrigued. I've even had people recommend that I go there, but Art put his foot down. I can't help but agree with him. Why pay restaurant prices for grilled cheese?

Instead, having too much broccoli in the frig and not enough time to use it in, I looked to the Moosewood Simple Suppers cookbook for a little hometoasted melt of my own.


Open-face Broccoli Melt
(adjusted from the broccolini cheddar melt)
What you need:
1 large broccoli crown
3 garlic cloves, minced
2 tsp olive oil
salt and pepper
2 slices of whole wheat bread
3 oz. shredded cheese (I used a mix of cheddar-jack)
Dijon or yellow mustard

1. Get out broccoli. Realize half of broccoli is too old to use anymore. Shake your head while tossing an entire large crown into the trash can. It is acceptable to mutter casual obscenities under your breath as you do so. Place remaining broccoli on a cutting board. Chop broccoli into 1/2 in long florets.
2.In skillet on high heat, cook broccoli with garlic in oil for 4-5 minutes. Sprinkle with salt and pepper. Add 1/4 c. water to pan and steam broccoli until water evaporates. Remove from heat.
3. As broccoli steams, get out your toaster. Look for your whole wheat bread. Fail to find the bread. Rummage around the kitchen muttering about vanishing bread until you remember you put the last open loaf in the refrigerator, because the last one you left out developed mold. Put one slice in the toaster. Be careful to place it at a low enough time setting so as not to burn it.
4. Congratulate yourself on not burning the toast. Spread mustard on the toast and place on a broiler pan. Top toast with broccoli, then cheese. Broil until cheese melts and is bubbly, 3-5 minutes. Serve hot, open faced.

I must say that over the years, I have grown fond of cheese and broccoli, broccoli and cheese. I haven't been to Melt yet, but that's fine by me. I make a mean melt myself.

Sunday, August 29, 2010

Kale Spiders

The garden is filled with good insects this time of year, none so much as in my kale bush, where a nest of hunting spiders have taken residence.
They are of a docile variety, who apparently also are camera shy, but every time I harvest the kale, I have to shake them, gently so as not to rip the tips of the leaves, to force off any spiders hiding along the curly edges. I once had three quite frazzled spiders fall haphazard from one large leaf. Uncertain of where they were and what had happened, they ventured for cover, one toward the zucchini, one toward my pant-leg, and one lucky critter headed back to the kale.
The next kale harvest, soon approaching, I will take the camera back to the garden in hopes of capturing a kale spider or two. And though I know that the spiders are keeping my greens safe from vegetarian insects, I can't help it; my skin crawls for an hour after shaking them off, mere inches from where my fingers grasp the stem.

Another carnivorous insect find: a praying mantis in the purple cherokee tomatoes.
Art spotted her while watering. I had missed her, despite the fact that I had plucked a tomato not centimeters from where she was stationed on the plant. She stood nice and still and allowed us to photograph her, begrudgingly putting up with the bright flash, but it wasn't long after that the shrieks and touchy mitts of the six-year-old boy scared her off.

Outside of our little plot, there is is flurry of activity at the sunflower garden:

While honeybees have been dying off at an alarming rate all over the country, there are plenty right by our tomato patch. Bees sometimes dangle from a sunflower, five or six at a time, hording that much-loved nectar on their tiny knees. No fear of stings here. You can walk right by them on the way to get water from the spigot (or stand directly in front of them to take upteen pictures) and they don't so much as flinch.


Insects aside, the plants themselves are really starting to produce. The cucumbers, long-dead, have been torn up in favor of a fall crop of red-leaf lettuce. But the soybeans are coming in.


There are copious amounts of eggplant.


The peppers are finally putting out.


And the Mr. Stripey tomato plant is actually developing good-sized green tomatoes, hopefully soon to turn pink-and-yellow-striped. This particular bush has been a wild one, flopping its many tentacles all over regardless of where it belongs. There was no reigning it in, but through all of June, July,and early August, not so much as a single tiny bud-like tomato. Suddenly, Mr. Stripey is beginning to show his feminine side with large and abundant offspring. 


All I can say is: it's about time.

Now don't think that just because I've spent a blog on nothing but gardening that I have gotten behind on the recipe testing. On the contrary, I have about five recipe cards sitting next to me with pictures already loaded of various attempts, usually involving one of more of the vegetables obtained from my garden. The problem is I've been working so hard making sure I have all my lesson planning ready for the start of classes at CSU in the morning that I haven't had time to post my blogs. Consider this a promise for many, many tasty dishes to come.
That, and I am so excited by my first garden and the many new insights it provides, the many ways it helps me see this city and its nonhuman occupants in a clearer light.

Monday, August 23, 2010

Using up my fresh garden veggies

The garden explosion is on. The zucchini have hit a lull, though any minute now, they look like they could just burst forth another brood of offspring. Eggplant are weighing down the eggplant vine to the dirty ground. Tomatoes abound. And the Kale...

My frig is stockpiled and all I can think is: I need some new recipes stat. On google, I typed "tomato and eggplant recipes" into the engine. Lo and behold, I happen upon a bounty of recipes, but one it particular seemed the order of the day.


Whole Wheat Penne w/ Eggplant, Zucchini, Kale, and Tomatoes. It seemed the recipe created specifically for my August garden. 
What you need:
2 T olive oil
onion
2 med eggplants, diced
1 clove garlic, minced
1 tsp. red pepper flakes
1 med. zucchini, diced
1 c. Kale
1 c. tomato (about one large one)
3T parmesan
salt and pepper
2 portions whole wheat penne

1. Boil the pasta.That's easy enough...
2. Heat large skillet over med. heat. Add oil and onion and saute 2 minutes. Not having 2 medium eggplants, dice up an assortment of mini fairytales and another non-globe variety. Realize you didn't cut up enough eggplant. Worry that you are running out of time and the oil is still sizzling. Enlist a kitchen helper (by way of handy cooking pseudo house husband) to help in the dicing. Manage to get all necessary eggplant. Add eggplant, garlic, red pepper flakes, salt. This will make for an oddly pretty mix of light brown with edges of purple ranging from lavender to aubergine and spots of red and dark brown. Cook until eggplant is browned, stirring, 6-8 minutes.
3. Realize you only have a tiny zucchini left from the garden's first zucchini onslaught. Dice it up anyway, aware that your meal will be light on the zucchini. Add zucchini and cook another 2 minutes. Add kale and cook one minute more. Add tomato, freshly plucked.
4. Stir and simmer about 1 to 2 more minutes. Add pasta water as needed so that the pan doesn't get too dry and the vegetables don't stick to the bottom of the pan. Add pasta to skillet. Add parmesan (The recipe originally calls for goat cheese. Who just keeps goat cheese lying around the refrigerator anyway?). Toss. Serve in bowls with an extra sprinkle of shredded cheese if desired.

The end result was very picture worthy, but very bland. I'm sure a few more spices could give it that needed pick-me-up. In my case, I hadn't had a lot of protein that day anyway, so I cooked up some fake sausage, cut it up, and added it to my bowl. Then there was plenty of spice to go around.


Even with the additions, I'm not sure I'd make this one again. There are so many great recipes out there to waste a re-do on mediocrity. Even so, I suppose it is a handy way to use the fresh veggies from the garden and that stockpile of pasta noodles we have in the pantry. I might just Kate-ify this one yet. I'll keep you posted.

Tuesday, August 17, 2010

Baked "Fried" Green Tomatoes (with accompanying omelet)

So, it happened. Finally, I get those first red tomatoes, those bright, shiny fire-engine beauties I've been waiting for since I shelled out the two-bucks-a-pop for tomato cages this spring. I recall clearly walking briskly back and forth between the tomato tables at the greenhouse (partly from excitement and partly because I had a cup of tea right before I left the apartment and I really had to pee). I read those little cards about each variety of plant, absent-mindedly stroking each tiny leaf. This one has low acidity. That one will be yellow with pink stripes. These over here, they bloom early.

The early-bloomers started to turn a few weeks ago, and I picked one early and watched it turn full-on purple-red on my mother's kitchen window ledge. The rest were a while in coming though. Admittedly, the events that are about to be described happened last week. In my tumult of over-booked activity, I have accrued a large stack of recipes next to the computer, taunting me with their unblogged-about smugness.

We were at the garden, a small plot at the far right corner of an episcopal churchyard. I was weeding. Art was watering. Garet, due to some strange juvenile need to be squirrelly, was planting a pine cone happily into the dirt beside a copse of coniferous trees... or at least, he called it a pine cone. That's when I spotted it: the first red Beefsteak. Eagerly, one-handed, I plucked the tender fruit from its vine and snap, the two adjacent green tomatoes beside it came too. I held them up mournfully to Art, and then, in a sudden spark of genius, I announced, "I could make fried green tomatoes."

Fried Green Tomatoes. It's a movie title I know well. In my youth, I was blessed with very overprotective parents who did not allow the viewing of movies until you had reached the age deemed appropriate for viewing by whatever lunatic organization that rates movies. My siblings and I contented ourselves with the meager movie options by repeatedly watching beloved movies over and over again. When my brother watched Forest Gump three times a day, I must admit, I grew tired of it, but I never lost my love, ever, for Fried Green Tomatoes. Perhaps it was the cultural significance. Perhaps it was the underlying lesbian implications. I like to think it was the food.

I never so much as tasted a fried green tomato before, but watching them sizzling in the diner pans of the Whistle Stop Cafe made me pine for them. Now, I had my chance. I googled, and found this site, run by a follow Michigander Katie, for nonfried green tomatoes. Here, I could fry my tomatoes and bake them too!


Baked Fried Green Tomatoes
What you need:
2/3 c bread crumbs
1 T Grated Parmesan Cheese
1 tsp cayenne pepper
1 T cumin
1/2 tsp salt
2 eggs, beaten (or the egg beaters equivalent)
2 green tomatoes

The logic of this is similar to what you do to bread the eggplant in this recipe.
1. Preheat the oven to 400 degrees F. Put the bread crumbs, parmesan, cayenne, cumin, and salt in one bowl. Mix. Put the egg in a second bowl.
2. Cut up the green tomatoes into thin, round slices.
3. Submerge a slice of tomato into the egg. Then, press both sides, alternately, into the bread crumb mixture for a light coat. Recoat in egg. Then, recoat both sides of slice in bread crumbs. Place slice on a tin-foiled baking sheet.
4. Cont. the same process for each tomato slice until all are coated and on the cookie sheet. Place the cookie sheet in the oven for 20 minutes. Flip the slices and return them to the oven for another 10-20 minutes. Serve.

As an added bonus, the leftover egg makes a lovely omelet, if cooked in a small skillet on low heat. Add an optional slice of cheese, if desired.

These nonfried beauties have opened my midwestern eyes to the possibilities of southern cooking. Each breaded slice resulted in a taste combination that was both complex and enjoyable. The tomato was tangy with a bittersweet edge to it that was nicely complimented by the earthly taste of cumin and the subtle fiery finish of the cayenne. I'm usually not a fan of a lot of heat in my food but it was just spicy enough. Luckily for me, if my weak taste buds became too overburdened with heat, I had a nice egg and cheese palette-cleanser right there on my plate.


Saturday, July 31, 2010

Sweet Sea Bass and Vegetables en Papillote (and Chips of course)

Art decided to purchase some sea bass on sale cheap at Giant Eagle at exactly the same time that I grew curious about the sea bass en papillote recipe in the French Women Don't Get Fat Cookbook. Of course, as is often the case, the recipe in the cookbook was not exactly what I wanted. (Who the hell keeps star anise in their larder anyway?) But the method for cooking the fish stuck with me. It seemed so... easy and healthy at the same time. And fairly cheap (star anise aside).

So I googled. And I googled. And finally I came across the perfect site for creating your own fish en papillote recipe. It's a blog called "Cooking with Alison," and Alison, whoever you may be, I salute you.

Now, I'm not sure if I've covered this particular fishy subject in my blog thus far, but if I haven't, I will say it now: this vegetarian sometimes eats sea food. And by sea food, I mean fish or, in restaurants, calamari. The reason for this: my vegetarianism is based strictly upon my need to eat what makes me feel healthy that I can afford. I cannot afford pasture-raised organic bison. I can afford eco-friendly fish. I try to keep up on the seafood watch list, and I can assure you that white seabass is currently a best choice in their book... or pocket guide, as the case may be.

Either way, fish oil is just plain good for you. And fish is fine in moderation, just like margaritas.

So on with my fish exploration: en papillote is a style of cooking in which you place the fish is parchment paper with a variety of vegetables and herbs and pop it in the oven. Inside the paper, the fish steams itself, along with the vegetables and in no time, you have a very healthy meal in it's own carrying case.

Of course, if you have no parchment paper, tin foil is also quite functional, though less pretty:


Because this is a fish dinner, I felt it needed some chips. I always bake, rather than fry my potatoes, so start the oven early, at 400. Cut up a few potatoes into rounds, place on a baking sheet, and salt. Put in the oven for about 10 minutes.

At the 10 minute mark, take the chips out and flip them, upping the oven to 425 for the fish. The fish will cook for 20 minutes, but the chips, when placed back in with the fish for the rest of their cooking time, should need only about another 10-15 minutes.

Sweet Sea Bass and Vegetables en Papillote
(serves 2)
What you need:
1 whole sea bass, minus head and tail and sliced into two equal pieces
1 med. zucchini, cut into matchsticks
1 red bell pepper, sliced and quartered
salt and pepper
Olive oil
2 T Strawberry Balsamic Vinegar
Pinch ginger, cinnamon, paprika, Italian seasoning, seafood seasoning

1. Preheat oven for 425 On two large squares of tinfoil, place the zucchini and pepper equally into the middle of each square. salt and pepper lightly.
2. Salt and pepper both sides of fish. Place on top of veggies.
3. Drizzle 1 T of the vinegar on each piece of fish. The sprinkle with each of the seasonings. Drizzle a little olive oil on top of each and the fold the tinfoil into packets.
4. Place the packets on a baking sheet and put in the oven for about 20 minutes. Fish should be cooked through before eating.


The resulting meal is sweet and savory. The chips, a needed compliment to fish, add a necessary light and crispy side. The fish, dusted with sweet spices and steamed with strawberry-flavored vinegar, is light and slightly tangy without any of that "fishy" taste that I really dislike. But the vegetables, by far, steal the show. Having been essentially marinated in the strawberry-cinnamon mix as the liquid pooled in the bottom of the tinfoil, they are sweet and flavorful with a hint of cinnamon and ginger, a fleck here and there of oregano, rosemary, and basil. Easily some of the best but lightly zucchini I have ever made. And plan to make again.