My paternal grandfather breathed his last this past Sunday. He had been ill for a while with a variety of ailments (probably a result of his early smoking years combined with repeated inhalation of sawdust), but just before Christmas, they found cancer. Surgery came just after Christmas and he'd been trying to recover since. But that major of a surgery was too much for an 82-year-old man with a history of asthma and heart problems.
Of course, you may know this particular grandfather as the one in love with hobo dinners. He also enjoyed the Three Stooges, electronic handheld games, woodworking, and baking a mean pie. I've been busy this week processing how to let him go, and not much has gone on in the kitchen as a result.
Of course, my man, being the giver that he is, immediately asked: "Does your mom want us to bring anything?" So for the showing on friday, he is making cookies and possibly banana bread, and for me, a classic standby that even the kid eats well. Grape Jelly Meatballs (with no meat). Usually we make a half batch of this for home. Twenty balls between two adults and one kid is more than enough, but it's also a good slow cooker recipe that anyone can appreciate. We'll be bringing a full batch for the showing, and I'm sure it'll get ate. Especially if I don't mention that the meatballs are fake.
Grape Jelly Meatballs (with no meat)
1 32 oz. jar grape jelly
2 12 oz. jars heinz chili sauce
40 frozen meatless meatballs (eggplant meatballs work well, as does textured veggie protein versions)
1. Combine jelly, chili sauce, and meatballs in slow cooker. Cook.
Alternatively: Combine ingredients in a pot. Cook.
Grape jelly doesn't seem like a fitting combo with chili sauce and/or meatballs, but something about the mix of flavors just works. It makes a tangy with a hint of sweet sauce that any unmeaty meatball can appreciate. Of course, you could use real meatballs too, but then, I wouldn't eat it.
It doesn't make anything better, but at least it gives me something to focus on. Planning the menu. Organizing the travel. Making sure that there's nothing more I can do.
Wednesday, January 26, 2011
Wednesday, January 19, 2011
Johnny Cake
I've been reacquainting myself with childhood favorites lately, those foods I know well and that I've had so many times their presence alone represents a form of comfort. It's comfort food I seek when the snow's a-falling. Most everyone does. To that end, I bring you Johnny Cake the way my mother used to make it on an almost weekly basis (we weren't wealthy and cornmeal is relatively inexpensive). For us, it was breakfast for dinner, that ultimate luxury of syrup at the dinner table.
Keep in mind, of course, that Johnny Cake is not cornbread. I've been told (though I can't remember by who) that the difference between these two foods is that cornbread is made with sugar and Johnny Cake without and that Johnny Cake was the food of choice for the cash-strapped confederates during the civil war. Now I don't know about war, but I did sustain injuries while making this dish, as did my faithful wooden spoon. Fortunately, at the end of it all, I had a comforting food to help make it all better. It was almost like having mom there to apply the antibiotic ointment.

Mom's Johnny Cake
what you need:
2 eggs
2 c. milk
2 tsp vinegar or lemon juice
2 c. cornmeal
1 c. flour
1 t. soda
1/2 t. salt
small 1/2 c. crisco oil

1. You need to sour your milk. The best way to do this is to add 1 tsp of vinegar or lemon juice (I used vinegar) to each cup of milk used. In this case, it's two. Mix milk and vinegar/lemon juice in a bowl and leave to sit out for 10-15 minutes. You'll know it's sour when there's a coating of curdles floating pond-scum-like on at the top of the milk.
2. Preheat oven for 350 and grease 13 x 9 cake pan. Now, other sizes of casserole dish could be substituted, but it will significantly change the cook time, as well as the level of moisture left in the finished product. I speak from experience: if you can, use the cake pan.
 3. When the milk is sour, add eggs and mix. Then add cornmeal and mix. Then add flour and mix. Then add soda and mix. Then salt and oil. And, you guessed it mix. When it's all mixy, pour it into the cake pan and plop it in the oven for 15-20 minutes.
4. Enjoy with a drizzle of maple syrup and perhaps a light dusting of powdered sugar if you're feeling frisky.
For a more healthy alternative, you could also make a side batch of kale cooked with one sliced up carrot and a can of black beans (undrained). Mash a slice of Johnny Cake up in a bowl with the veggies. It will look rather corn-dumpling-ish. Not quite as sugary delish, but quite comforting in its own way.
For the carnivorous out there, I've been told by the men in the house that it also pairs quite nicely with oven-baked leftover ham.

Monday, January 17, 2011
Epic Fail
I have a dry erase board magnetically adhered to the refrigerator. It is the same dry erase board that I had surgically adhered to my graduate assistant "office" (i.e. cubicle) during my stint as a masters student in Literature. Now, instead of witty quotes from professors, classmates, and required reading material for class, it holds the weekly menu, though sometimes I put a quote up there for old time's sake. And nothing quite expresses my weekend kitchen adventures at the moment quite like my trusty dry erase board:

Allow me to explain. Sometimes it's a good kitchen week. Sometimes you walk into that kitchen like you own the thing (even though it's only leased until the summer of 2012). You grab a pot and its like a witch's caldron. In go the ingredients and out pops magic. Sometimes you just get it right on the first try. You don't even bother to measure things out, and somehow, you just know what to do to make a good dish into a great meal. This week was not that week. This week was a bad kitchen week.
Exhibit A:
German cabbagy noodles Friday. This was a recipe idea given to me by a recent graduate of my academic institution. And it's a great recipe idea. Some egg noodle, some cabbage, a little carrot, some vinegar, a little sugar. It should be an easy peasy meal. Brainless even. Unfortunately, this was a bad kitchen week, so I managed to completely screw it up. Instead of going with my gut, I decided to find a recipe with some sort of measurements listed for how much vinegar to use versus how much sugar. I ended up making my "sauce" based on another german dish that was, essentially, noodles and celery.
The problem: cabbage in no way reacts to vinegar and sugar in the way that celery does. Now I know this. Of course, if I would have just made the blasted dish and added a little bit of each at a time until I got the taste right, I never would have needed to learn this lesson. The recipe I came up with looks a little something like--
 German Cabbagy Noodles
1/2 bag egg noodles, cooked
3 carrots, shredded
2 c. cabbage, shredded
2 T flour
1/2 c. apple cider vinegar
1/3 c. water
salt and pepper
1. Add flour, vinegar, water, salt, and pepper to a pan on med heat. Mix thoroughly. Add noodles, carrot, and cabbage.
Of course, I wouldn't make this particular recipe if I were you. I wish I was you because then I would have never had to taste it. It came out far, far too sweet. I tried to douse the sweetness with more flour and water, but to no avail. In a last ditch effort, Art poured in some soy sauce and then he ate it on pumpernickel, claiming the soy sauce made it edible. It wasn't. I will try again, but I'll have to do it for a sole lunch at school. Art has no desire to attempt German Cabbagy Noodles now or in the future.

Exhibit B:
Sunday's dinner was Johnny Cake. No fear, it turned out swell, a little dry perhaps, but swell. This was another type of kitchen calamity entirely. You see, the Johnny Cake is supposed to bake in a 13 x 9 pan, but we used up ours on an actual cake. No worries. I put the Johnny Cake in an oval casserole dish instead. Of course, it took twice as long to cook, being a lot thicker than usual, and after that, the center was still a little jiggly. As a solution to the jiggly, I put the lid on the casserole dish to help keep heat in without drying the Johnny Cake too much. It did work.
Unfortunately, I checked it too soon and the center still wasn't quite done. Like an idiot, I grabbed the lid to put it back on. Then I realized I wasn't using a pot holder. It started to hurt, but I already started lifting it. I couldn't very well drop it. The lid is solid glass. It would have shattered and worse, on my toes, so I had to forgo pain and get the lid back to the stove top, where a pan of veggies was bubbling happily away. Lid safely down, I ran to the sink and stuck my hand under cold water. I was whining and moaning and generally feeling sorry for myself when Art made a sound that was part alarm and part panic. I looked at the stove and there, to my horror, was a wooden spoon on fire.
You see, we have a gas stove. When I dropped the lid, it knocked the stirring spoon for the veggies into the blaze underneath the veggie pan. Art got the fire out quickly, but the spoon will forever hold the marks of my misfortune.

And the Johnny Cake, you ask? That's for next time.
Wednesday, January 12, 2011
Mom's Mac N Cheese
My maternal grandmother was a great many things. Foremost of those was a homebody. Until dementia took her fear away, she was uneasy to leave the confines of her own yard, and she was content there (mostly) raising 14 children. I remember her most for the way in which she froze her Cool Whip and then allowed us to eat it like ice cream, but Cool Whip, for her, was a modern invention. She raised 5 children right through the depression and into the second world war, when more would come. At one time, there were 11 children, plus two adults, living in their two bedroom house. At the time, it had an outdoor toilet.
She was a resourceful lady. She made a lot with a little and she did it cheaply. In honor of that idea, one of her classic dishes, passed down to my mother and then, on to me, is her version of homemade macaroni and cheese. I've never had any that came close.
While we were in Michigan this weekend, mom made enough for all of us to share a less frequent family meal. It works well for blogging purposes, as the last time I made it has yet to be blogged.

Mom's Mac N Cheese
(Tried and true recipe for generations)
serves 4-6
1 8 oz. box macaroni (I--the health-conscious veggie of the family--use wheat mac)
3 T margarine/butter
2 T flour
1/2 t salt
2 1/2 c milk
1/2 lbs grated cheese
1. Place butter in a skillet. When melted, add flour and salt. Stir until blended. Add milk to flour mix, stirring constantly until well blended. Cook until cheese melts. How, here's my favorite part of the recipe, word for word: "By making the sauce first, you have a much more delicious concoction."
 2. Grease casserole dish (or dishes. as the case may be) and place macaroni in dish. Put cheese sauce over macaroni. And cook in pre-heated oven, set for 350 degrees, for one hour.
Whenever mom busts out the mac n cheese recipe, I'm a kid again. There's a perfection in the imperfectness of the consistency, the way it globs together on a fork, that just can't be matched by the neon orange boxed varieties, try as they may.
When I made this recipe myself in the confines of my Cleveland apartment's kitchen, I paired it with a side of Toasti, just to add a bit of vegetables to this nonvegetable vegetarian feast, pairing a new favorite with an old for a nice mix of flavors and colors and textures.
I'm sure everyone has at least one childhood dish they couldn't give up. This is mine. What's yours?

Monday, January 10, 2011
Chili three ways
Mexican month (which was back in November for us) would not have been complete without Chili. So we had our fair share of new and interesting varieties of Chili. Of course, as with all families, we have our own usual chili.
Of course, if you give any or all of these recipes a try, don't forget to make oven fries to have chili cheese fries with the leftovers.
Any Night of the Week Chili
What you need:
1 can tomato juice
1 can tomatoes
1 can chili beans
1 can kidney beans
1/2 bag fake burger crumbles
1 bag gumbo mix frozen veggies (I love some okra in my chili)
1/2 to 1 square baker's chocolate
an odd mix of seasonings to taste (of these we are known to add chili powder, cayenne, cumin, pepper, salt, garlic powder, fresh minced garlic)
1. Put in a caldron-sized pot and simmer for a few hours until desired consistency.
We love our chili. It is just enough of the things we love all mixed in one pot. And it's not too spicy. But of course, the world is better experienced if you aren't afraid to branch out and try new things. Also, I do love my lentils. So, low and behold:

Sweet and Spicy Lentil Chili
(adapted from the Vegetarian Slow Cooker)
What you need:
1 T olive oil
1 large sweet yellow onion
2 cloves minced garlic
2 T chili powder
1 1/2 c. dried brown lentils, rinsed
1 28 oz. can crushed tomatoes
1/3 c. blackstrap molasses
1/2 t ground allspice
cayenne pepper to taste
salt and pepper
2 c water
1 c. apple juice
1. Heat oil in large pot, med heat. Add onion-garlic, cover, and cook to soft, 5 minutes. Stir in chili powder and cook 30 seconds.
2. Add lentils-pepper. Stir in water and apple juice, cover. Cook on Med. heat until desired consistency.
This Chili, we agreed, was delicious, but not quite as "chili" tasting. i.e. heavy on the tomato sauce. It did, however, offer a sweet and tangy taste and hearty texture that worked very nicely with corn bread rather than cheese fries. It also reheated well and the chili/cornbread mix made a tasty week of mommy's school lunches.
I have to give props just to the molasses. I had somevin the the cupboard for quite a while after trying out a failed recipe for vegan chocolate chip cookies. We busted it out for this chili and have since used it in a variety of dishes, as a meat baster, in cookies. Molasses is the new heal-all of our kitchen. Try molasses recipes. They are worth it.
While we were at it, I busted out the Moosewood Restaurant Celebrates cookbook for their take on this mexican fiesta in a bowl:

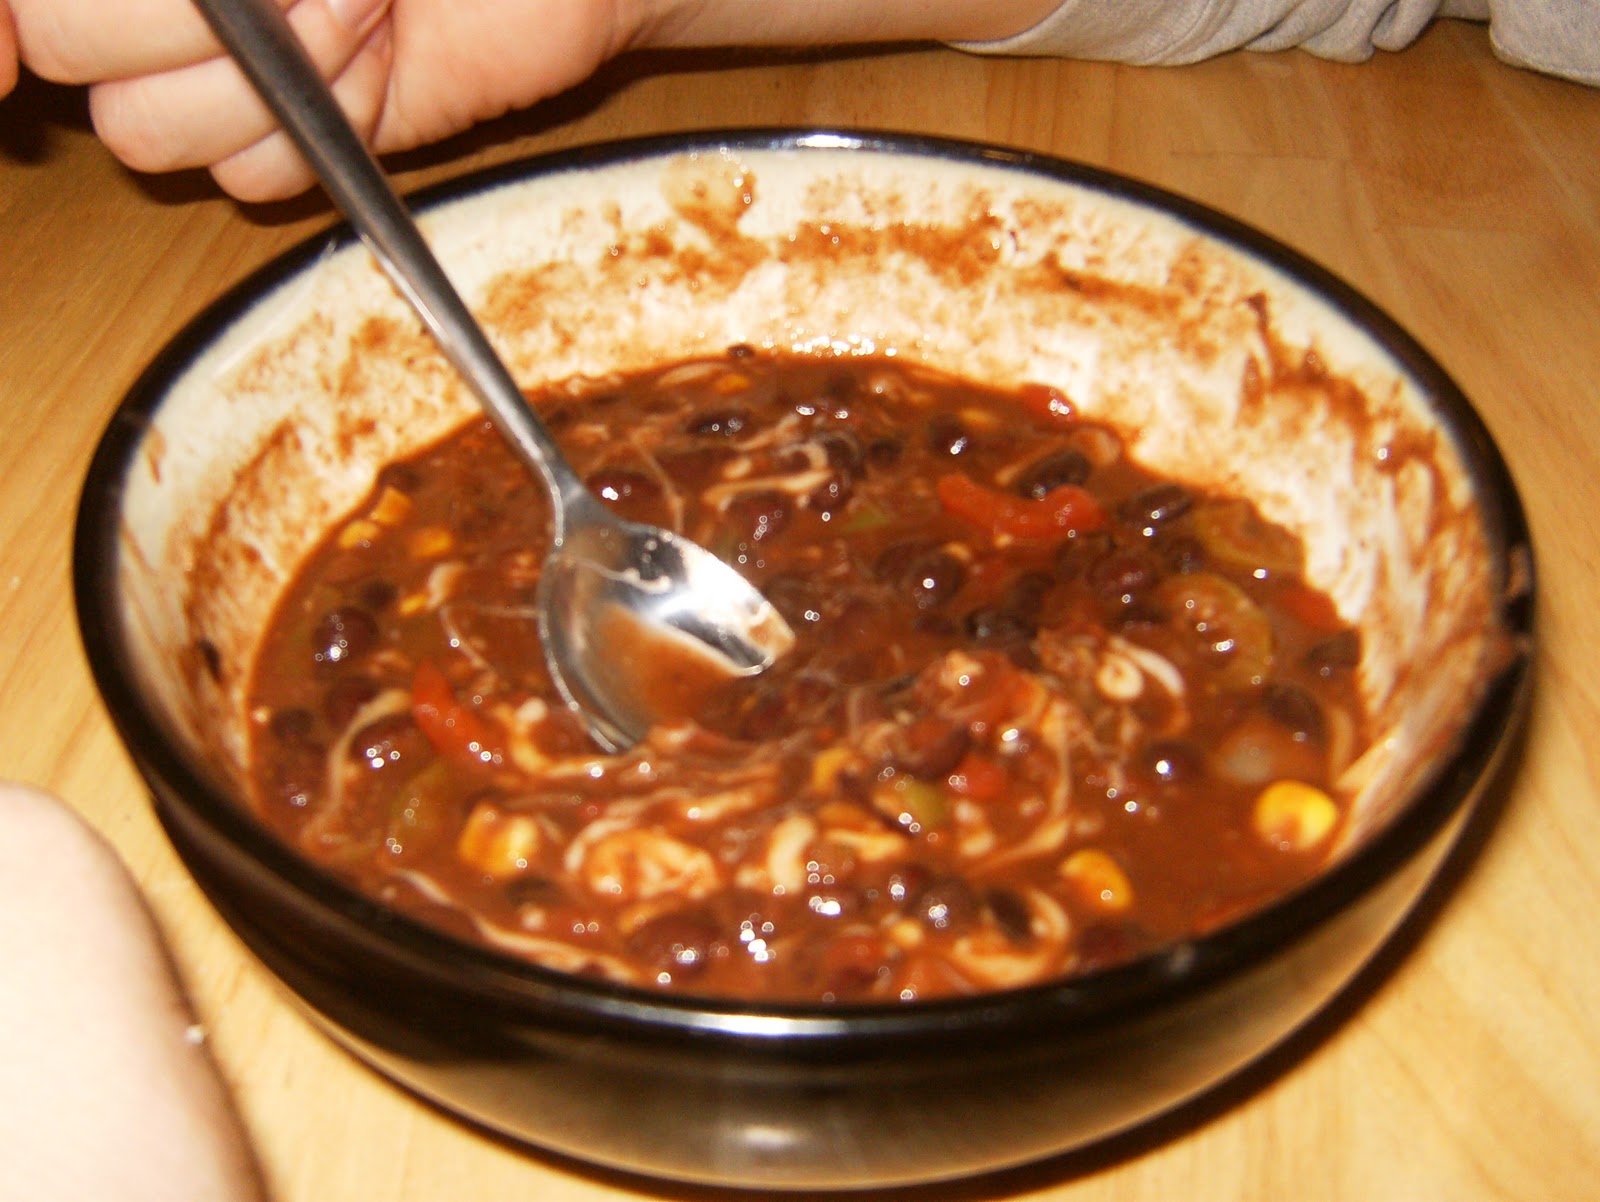
Black Bean and Chocolate Chili
(adapted from Moosewood Celebrates)
what you need:
2 T veggie oil
1 1/2 c. chopped onions
4 minced garlic cloves
1 celery stalk, diced
1 T ground cumin
2 t fried oregano
1/2 t ground cinnamon
pinch ground cloves
1 t cayenne
1/2 t black pepper
1/2 t salt
1/2 c chopped bell peppers
1 bag gumbo mix frozen veggies
2 15.5 oz cans black beans
1 can undrained crushed tomatoes
1 T lemon juice
1 T soy sauce
1 1/2 oz semi-sweet chocolate chips (about 1/4 c)
1. In pot, warm oil on med heat. Add onion and garlic and saute about 10 minutes. Add celery and cover. Cook 5 minutes.
2. Reduce heat and stir in cumin-frozen veggies. Cover and cook 5 minutes, stirring occasionally.
3. Add black beans-soy sauce. Bring to a simmer, cover, and cooke 5-10 minutes more. Stir in chocolate. When melted, adjust seasonings and lemon juice to taste.
Quite tasty with added shredded cheese, though optional.

Of course, if you give any or all of these recipes a try, don't forget to make oven fries to have chili cheese fries with the leftovers.
Any Night of the Week Chili
What you need:
1 can tomato juice
1 can tomatoes
1 can chili beans
1 can kidney beans
1/2 bag fake burger crumbles
1 bag gumbo mix frozen veggies (I love some okra in my chili)
1/2 to 1 square baker's chocolate
an odd mix of seasonings to taste (of these we are known to add chili powder, cayenne, cumin, pepper, salt, garlic powder, fresh minced garlic)
1. Put in a caldron-sized pot and simmer for a few hours until desired consistency.
We love our chili. It is just enough of the things we love all mixed in one pot. And it's not too spicy. But of course, the world is better experienced if you aren't afraid to branch out and try new things. Also, I do love my lentils. So, low and behold:

Sweet and Spicy Lentil Chili
(adapted from the Vegetarian Slow Cooker)
What you need:
1 T olive oil
1 large sweet yellow onion
2 cloves minced garlic
2 T chili powder
1 1/2 c. dried brown lentils, rinsed
1 28 oz. can crushed tomatoes
1/3 c. blackstrap molasses
1/2 t ground allspice
cayenne pepper to taste
salt and pepper
2 c water
1 c. apple juice
1. Heat oil in large pot, med heat. Add onion-garlic, cover, and cook to soft, 5 minutes. Stir in chili powder and cook 30 seconds.
2. Add lentils-pepper. Stir in water and apple juice, cover. Cook on Med. heat until desired consistency.
This Chili, we agreed, was delicious, but not quite as "chili" tasting. i.e. heavy on the tomato sauce. It did, however, offer a sweet and tangy taste and hearty texture that worked very nicely with corn bread rather than cheese fries. It also reheated well and the chili/cornbread mix made a tasty week of mommy's school lunches.
I have to give props just to the molasses. I had somevin the the cupboard for quite a while after trying out a failed recipe for vegan chocolate chip cookies. We busted it out for this chili and have since used it in a variety of dishes, as a meat baster, in cookies. Molasses is the new heal-all of our kitchen. Try molasses recipes. They are worth it.
While we were at it, I busted out the Moosewood Restaurant Celebrates cookbook for their take on this mexican fiesta in a bowl:

Black Bean and Chocolate Chili
(adapted from Moosewood Celebrates)
what you need:
2 T veggie oil
1 1/2 c. chopped onions
4 minced garlic cloves
1 celery stalk, diced
1 T ground cumin
2 t fried oregano
1/2 t ground cinnamon
pinch ground cloves
1 t cayenne
1/2 t black pepper
1/2 t salt
1/2 c chopped bell peppers
1 bag gumbo mix frozen veggies
2 15.5 oz cans black beans
1 can undrained crushed tomatoes
1 T lemon juice
1 T soy sauce
1 1/2 oz semi-sweet chocolate chips (about 1/4 c)
1. In pot, warm oil on med heat. Add onion and garlic and saute about 10 minutes. Add celery and cover. Cook 5 minutes.
2. Reduce heat and stir in cumin-frozen veggies. Cover and cook 5 minutes, stirring occasionally.
3. Add black beans-soy sauce. Bring to a simmer, cover, and cooke 5-10 minutes more. Stir in chocolate. When melted, adjust seasonings and lemon juice to taste.
Quite tasty with added shredded cheese, though optional.
Overall, Mexican month was a success, largely to the many delicious chili recipes available to us. Happy slurping.
Wednesday, January 5, 2011
Sweet Potato/Butternut casserole
Like many foods I adore, the sweet potato came to me only as an adult. I never had a holiday meal in which yams were present as a kid. But there's something about this little tuber that I can't deny. Perhaps it is the orange coloration. Perhaps the way it melts on the tongue when combined with butter and cinnamon. Or that it makes one hell of a french fry.
In the midst of December's Devil-may-care month of the Northern American continent, Art discovered a southern food recipe blog with some good ideas. Here was a casserole that required fair amounts of squash and yams, and would you imagine: we have a crap-ton of both, particularly that bushel of squash from the orchard. So Art made it. And it was heavenly. He thought it was a delightful twist to the usual sweetened yams. I thought it was delightfully similar in taste to my beloved pumpkin pie. Even the seven-year-old had to agree: this orangish goop with the crunchy topping, it works. Art made it several more times over the month, and then, in a flash of inspiration--I decided to have a go at it for Christmas dinner at my parent's house.

Praline Butternut Squash and Sweet Potato Casserole
Adjusted from the Kitchen of Deep South Dish
serves 6
1 butternut squash
3 large sweet potatoes
1/2 cup sugar
Dash allspice
Dash cinnamon
2 tablespoons vanilla
3 eggs, beaten
Approximately 1/2 cup of milk
1/3 cup unsalted butter, melted
1 cup packed light brown sugar
1/3 cup unbleached all purpose or wheat flour
1 cup finely chopped pecans (I beat the heck out of them with a meat tenderizer)
1. Preheat oven to 400 degrees to roast the squash. Slice the butternut squash in half, scoop out the seeds and fibers, and rinse. Place the squash on a cookie sheet covered in tin foil. Rub butter on the fleshy side and cook face-down until you can pierce straight through with a fork, about an hour.
2. Boil water in a large pan. Peel the sweet potatoes. You can quarter them if you have the strength and a very sharp knife but be careful not to cut your thumbs off. In fear of losing an appendage? Just toss them in the water whole. It takes a little longer to cook but you don't have that messy hospital bill to worry about. Boil until fork goes through easily.
3. When you are ready to make the casserole, preheat the oven to 350 degrees. Spray a 2 quart casserole dish with non-stick cooking spray. Scoop the flesh out of the squash with an ice cream scoop and add it and the sweet potatoes into a mixing bowl. Mix until smooth; add in the sugar, allspice, cinnamon, vanilla and eggs. Blend well and add just enough milk to moisten (I don't think we've ever needed the milk). Pour the thick mix into the casserole dish.
4. Now, on to the praline topping. Melt the butter. While it melts, mix brown sugar, flour and pecans in a small bowl. Pour the butter into the brown sugar mixture and stir. Sprinkle over the top of the casserole. Bake 45 minutes - 1 hour.
Of course, my Christmas version did not taste as good as when Art did it in Cleveland. The reason: the Deep Dish informs readers that the topping ingredients are for a double batch, so I halved everything for the topping. Art did not and I never will again. Even after I added the extra brown sugar to the top, though, it didn't taste quite right. I blame the fact that my mom's casserole dish is deep and round, while ours is shallow and oval. The ratio of topping to veggies just seems better in a shallower dish. Overall, though, a definite keeper. As my son said, "I could have squash every night!"
How about that.
Subscribe to:
Posts (Atom)